
 The benefits of AACVPR’s Cardiac and Pulmonary Data registries are undeniable. But if you’re a Registry user, you also know there’s a small drawback to the process: when you upload a patient from your system to the Registry, you get an auto-response; if you upload 100, you get 100 auto-responses. It’s a necessary evil to confirm successful uploads and warn of failed uploads, but that doesn’t make it any less frustrating.
Luckily one of ScottCare’s longtime software developers, Greg Saven, took it upon himself to figure out a trick to prevent these messages from overwhelming your inbox. We thought we’d share.
NOTE: although these tips were created using Outlook 2013, modifying them to other versions of Outlook shouldn’t require much variation. If you use another email program, you or your IT team are likely able to adapt the idea for a similar solution. And, of course, if you’re a ScottCare customer, we’re happy to help you if the below tips aren’t sufficient for your email setup.
Now back to our post!
Because most customers have communicated to us that they only need to know which patients failed to upload correctly, this tip will allow you to automatically delete 'success' messages and focus on the ones that failed.
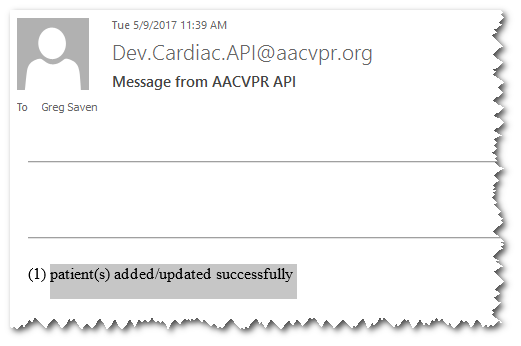
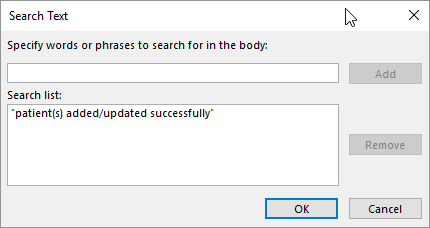
Start by opening one of the auto-response messages, then select and copy the text "patient(s) added/updated successfully". You’ll need this text later and Outlook doesn’t let you get at it while creating a rule.
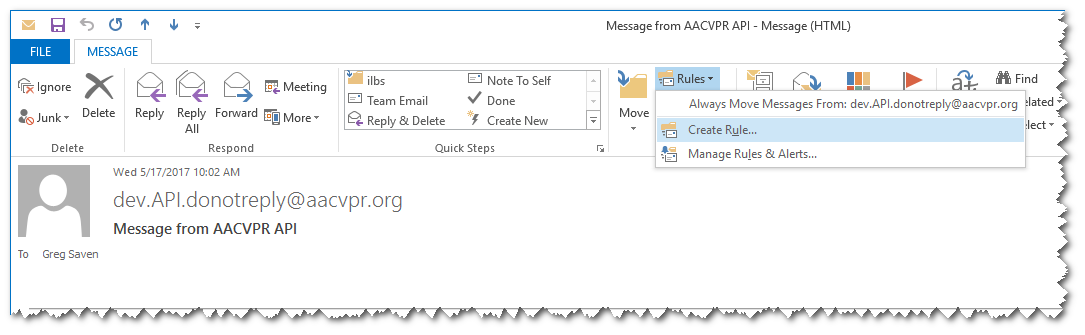
Now find the Rules item on the ribbon of the email message, click it and then click Create Rule…
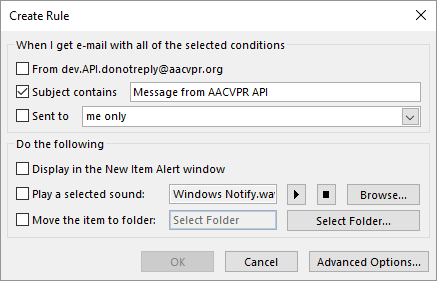
This will open the Create Rule dialog. Check the box next to Subject contains, then click the Advanced Options… button.
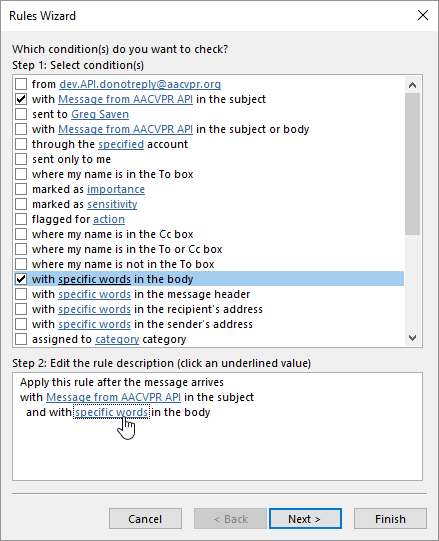
This will open the Rules Wizard dialog. Check the option with specific words in the body. Then in the "Step 2…" box below, click the link specific words.
This will open the Search Text dialog. Paste (Ctrl-V)—or type it exactly as it appeared—the text you copied from the body of the email into the Specify words… box and click Add. That phrase will then appear in the Search list: box. Then click OK.
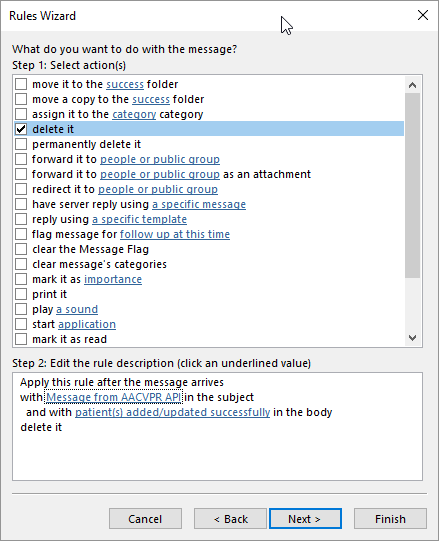
Click the Next button on the Rules Wizard dialog and in the "What do you want to do with the message?" options, select delete it.
Then click Finish and you’re done!
Keep in mind, this is just one way to handle the influx of Registry notifications. Another option is to create specific folders for Success and Failed messages and then create rules that sort incoming messages into those folders. Since there are so many options for organizing and filtering your email, we encourage you to check with your IT department. You can also learn more at this link from Microsoft Office Support.